


Commerical Bread Cabinet First-Time Use Step-by-Step Guide
Proper first-time use of a bread cabinet is critical to extending its service life, ensuring stable cooling performance, and preserving the freshness, texture, and food safety of stored bread. Whether you operate a bakery, café, or commercial kitchen, overlooking initial setup steps can lead to equipment malfunctions (e.g., uneven cooling, compressor overload) or reduced bread shelf life.

1. Pre-Use Unboxing & Inspection: Avoid Hidden Damages
Before installation, thoroughly inspect the bread cabinet to rule out shipping damage or missing components—this step prevents future operational issues caused by pre-existing defects.
Key Inspection Items:
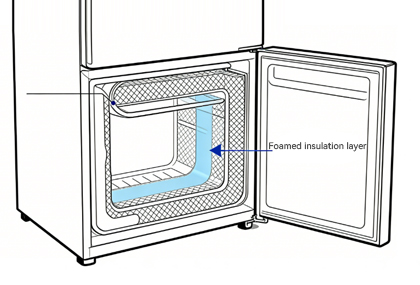
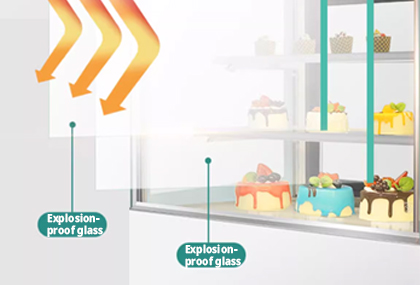
Exterior & Interior Condition: Check for dents, scratches, or cracks on the cabinet body, glass door (if equipped), and inner liner. A damaged liner may compromise insulation, leading to energy waste and temperature fluctuations.
Component Completeness: Verify that all accessories (e.g., adjustable shelves, door gaskets, LED interior lights, temperature control knobs) are included and intact. Missing or damaged door gaskets are a common cause of cold air leakage—ensure they are properly sealed and free of tears.
Manual & Certifications: Locate the manufacturer’s user manual (critical for model-specific instructions) and confirm compliance labels (e.g., CE for European safety standards, UL for North American electrical safety).Never skip the manual—even if you’ve used other bread cabinets, different brands may have unique requirements (e.g., voltage, temperature range).
2. Installation Environment: Lay the Foundation for Stable Performance
Bread cabinets rely on proper ventilation and temperature control to operate efficiently. A poorly chosen installation location is one of the top reasons for first-time failures (e.g., overheating compressors).
Must-Follow Environment Rules:
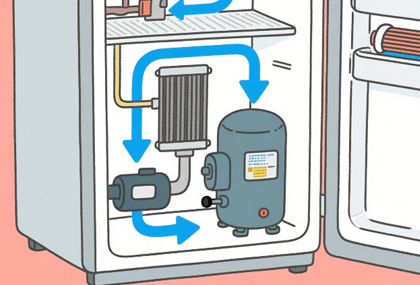
Space Requirements: Maintain a clearance of10–15 cm on the left, right, and rear sides of the cabinet. This ensures airflow around the compressor (the “heart” of the cooling system) and prevents overheating. Do not place the cabinet against walls or in tight corners.
Avoid Heat & Direct Sunlight: Keep the cabinet away from heat sources such as ovens, grills, coffee machines, or radiators—these force the compressor to work harder, shortening its life. Direct sunlight will also raise the cabinet’s internal temperature, making it harder to maintain consistent cooling.
Ambient Conditions: The ideal ambient temperature for installation is15–32°C (59–89.6°F), with relative humidity between 50–75%. High humidity (above 80%) can cause condensation inside the cabinet, leading to mold growth on bread; low humidity (below 40%) may dry out bread prematurely.
Level Surface: Use a spirit level to ensure the cabinet is perfectly horizontal. An unlevel cabinet can cause the door to misalign (leading to cold air leakage) or shelves to slide. Adjust the bottom feet as needed to correct tilting.
3. Electrical Safety: Prevent Short Circuits & Overloads
Bread cabinets are electrical appliances—incorrect power connection is a major safety hazard (e.g., electric shock, fire) and can damage internal components.
Electrical Precautions:
Voltage Matching: Confirm the cabinet’s rated voltage (e.g., 220V/50Hz for Europe, 110V/60Hz for North America) matches your power supply. Using a voltage converter is not recommended for long-term use, as it can cause unstable power flow to the compressor.
Grounding is Mandatory: Plug the cabinet into athree-prong grounded outlet (with a dedicated earth wire). Do not use a two-prong adapter or skip grounding—this protects against electric shock if the cabinet’s wiring malfunctions.
Dedicated Circuit: Avoid sharing the outlet with other high-power appliances (e.g., mixers, refrigerators). A dedicated 10A–16A circuit prevents voltage drops that can disrupt the cooling system.
Check Power Cord: Inspect the power cord for fraying, cuts, or exposed wires. If damaged, contact the manufacturer for a replacement—never attempt to repair the cord yourself.
4. Cleaning & Disinfection: Ensure Food Safety
New bread cabinets may have dust, manufacturing residues (e.g., plastic film, adhesive), or odors from packaging materials. Cleaning before use is non-negotiable for food safety.
Step-by-Step Cleaning Process:
1.Unplug the Cabinet: Always disconnect power before cleaning to avoid electric shock.
2.Remove Protective Materials: Peel off all plastic films, stickers, or foam padding from the interior, shelves, and door.
3.Wash Interior & Shelves: Use a soft cloth dipped indiluted neutral detergent (e.g., mild dish soap mixed with warm water). Avoid abrasive cleaners (e.g., scouring pads, bleach) or solvents (e.g., alcohol, acetone)—these can scratch the inner liner or damage door gaskets.
4.Clean Door Gaskets: Wipe the rubber gaskets with a damp cloth to remove dust and residues. Gaskets are critical for sealing cold air—ensure they are not twisted or damaged.
5.Deodorize (If Needed): If the cabinet has a plastic or chemical odor, place a bowl of baking soda inside for 24 hours (with the door closed) to absorb smells. Discard the baking soda before use.
6.Dry Thoroughly: Wipe all surfaces with a clean, dry cloth to prevent condensation or mold growth. Do not reassemble shelves until they are completely dry.
5. No-Load Test: Verify Cooling Performance
Before loading bread, run the cabinet empty for 2–4 hours to test if the cooling system works properly. This step catches issues (e.g., uneven cooling, faulty thermostats) before they affect your products.
How to Conduct a No-Load Test:
1.Set the Correct Temperature: Refer to the manual for the recommended temperature range. Most bread cabinets operate at4°C–10°C (39.2°F–50°F)—this balances freshness (slows mold growth) and texture (prevents bread from drying out). For specialty breads:
Soft breads (e.g., brioche, sandwich loaves): 6°C–8°C
Hard breads (e.g., baguettes, sourdough): 4°C–6°C
Pastries (e.g., croissants, Danish): 8°C–10°C (to avoid butter crystallization)
1. Monitor Temperature Stability: Use a digital thermometer (place it in the center of the cabinet) to check if the internal temperature reaches and maintains the set value within 2–4 hours. Avoid opening the door during the test—this disrupts temperature stability.
2. Check for Abnormalities: Listen for unusual noises (e.g., loud rattling, screeching) from the compressor—these indicate potential malfunctions. Also, confirm the interior light (if equipped) turns on/off when the door is opened/closed.
6. First-Time Loading: Protect Bread Quality
Once the no-load test passes, load bread carefully to avoid overloading or blocking airflow.
Loading Precautions:
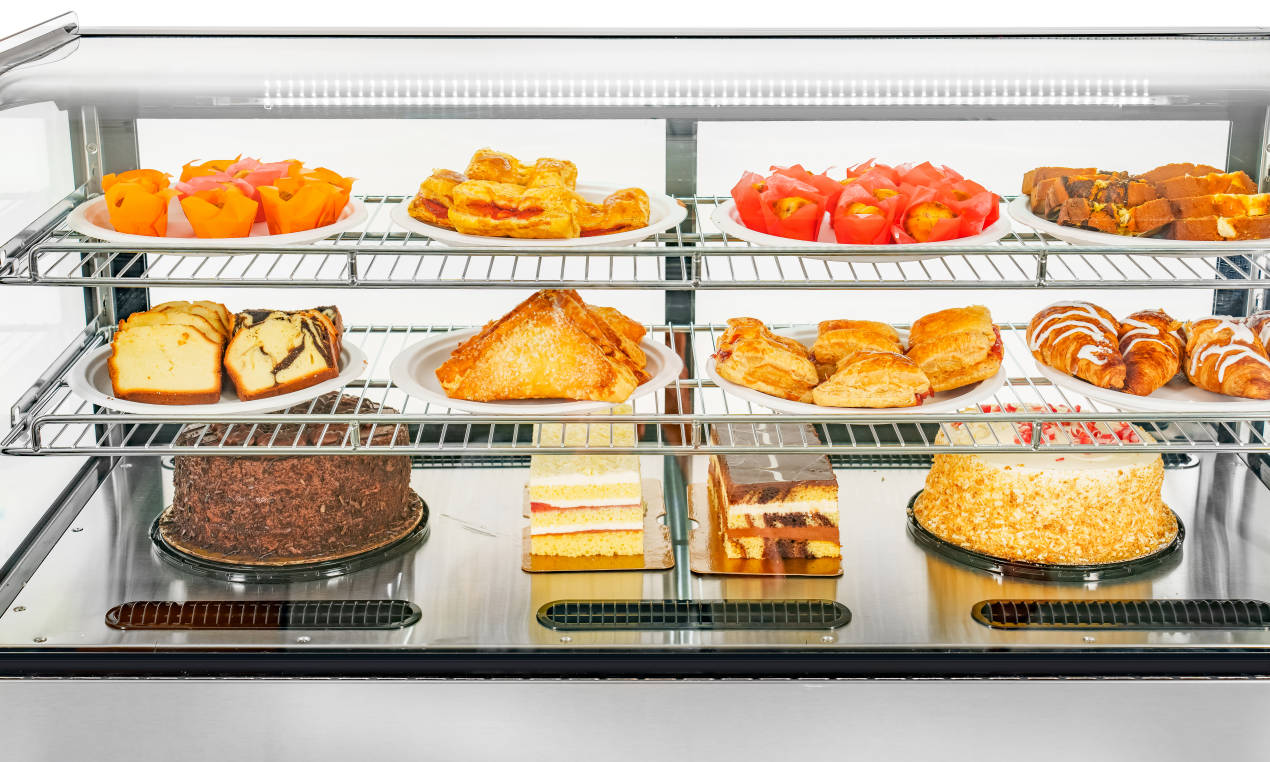
•Do Not Overload: Leave 5–10 cm of space between loaves and between bread and the cabinet walls. Overloading blocks air vents (usually located on the back or sides of the interior), causing uneven cooling—some bread may mold while others dry out.
•Sort by Bread Type: Group similar breads together (e.g., soft breads on one shelf, pastries on another) to simplify temperature management. Avoid storing bread with strong odors (e.g., garlic bread) near neutral-flavored breads—odors can transfer.
•Use Bread-Friendly Containers: Store sliced bread in airtight plastic or paper bags to retain moisture. Whole loaves can be placed directly on shelves, but avoid using metal containers (they may conduct cold and dry out bread).
•Avoid Hot Bread: Never place freshly baked, warm bread into the cabinet. Hot bread releases steam, which condenses inside the cabinet and can cause mold growth or water damage to the liner. Let bread cool to room temperature (20°C–25°C) first.
7. Post-Use Maintenance Reminders
To keep the cabinet running smoothly after first use, adopt these simple habits:
•Daily Checks: Inspect the door gasket for dirt or damage; wipe it clean daily. Check the internal temperature once a day to ensure it stays within the recommended range.
•Weekly Cleaning: Wipe the interior shelves with a damp cloth to remove crumbs or bread residues. Clean the exterior with a soft cloth to maintain appearance.
•Monthly Inspections: Vacuum the dust from the compressor’s air filter (located on the rear of the cabinet) to improve ventilation. If the filter is clogged, the compressor will overheat.
The first use of a bread cabinet is not just about “plugging it in”—it requires careful inspection, proper installation, thorough cleaning, and systematic testing to ensure safety, performance, and bread quality. By following these steps, you’ll protect your investment (extend the cabinet’s lifespan by 3–5 years on average) and keep your bread fresh for longer.
Always remember: When in doubt, refer to the manufacturer’s manual or contact their customer service—this is the most authoritative source of information for your specific model.
Cooluma advises that different bread display cabinets may require slight variations in usage; please adapt accordingly to the specific circumstances.
Sources: International Society of Food Science and Technology (ISFST) Food Storage Guidelines, European Committee for Standardization (CEN) EN 16885 (Commercial Refrigeration Equipment Safety), UL 471 (Standard for Commercial Refrigerators and Freezers).

Most popular More «
-
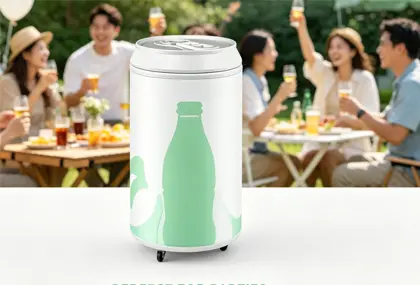
BC Series Can-Shaped Beverage Coolers
-
Do Cakes Require Commercial Refrigerators?
-
Best EC50 Mini Beverage Cooler for Global Export
-
Guide to Floor-Standing Refrigerated Cabinets for Coffee Shops
-
Why Cooluma Focuses on the Mid-to-High-End Refrigerated Display Cabinet Segment?
-
How Many Pans Does a Gelato Display Freezer Hold?
-
Why Are Cooluma Cake Display Cabinets So Popular?
-
Commercial Bakery Display Case with Curved Glass
-
A Buying Guide for Cake Display Cabinets with Built-in Adjustable Layered Shelves
-
An Analysis of the Advantages of Stainless Steel Refrigerated Display Cabinets