


How to make Gelato at home in 5 steps?
Every time I savor gelato on the streets of Italy, I'm captivated by its melt-in-your-mouth, velvety texture—free from the heavy sweetness of American ice cream, each bite delivers the pure essence of its ingredients. Many believe “making Italian gelato at home is difficult and requires professional equipment,” but that's not true. By focusing on three core principles—“low milk fat, slow churning, and full maturation”—you can achieve a texture close to professional standards using household tools.
We've compiled a beginner-friendly 5-step guide, detailing key points and pitfall-avoidance tips at every stage from ingredient prep to final shaping. Follow it step by step for guaranteed success!
Preliminary Notes:The essence of Italian gelato lies in “low fat content, minimal air incorporation, and thorough aging.” Its fat content is controlled between 4%-8% (compared to American ice cream ≥10%), which is key to its rich, velvety texture without greasiness. For home preparation, an ice cream maker is highly recommended (to minimize air incorporation). Alternatives exist without a machine, detailed later.
[Essential Tools] (Beginners need not buy expensive ones—basic models suffice)
- Core Tool: Home ice cream maker (preferably with built-in freezing function; otherwise, use standard model + pre-frozen freezer bucket);
- Support Tools: Small saucepan, whisk, thermometer (optional; use feel if unavailable), airtight container (for setting);
- Optional tools: Hand blender (for pureeing fruit), fine-mesh strainer (for smoother batter).
【Basic Ingredients】(Serves 2-3, adjust to taste)
Classic Vanilla Flavor (ideal for beginners, least prone to errors):
- Milk: 300ml (use whole milk for richer creaminess; avoid skim milk as it affects texture);
- Heavy cream: 100ml (30%+ fat content; controlling quantity is key for low-fat ice cream—don't add more);
- Egg yolks: 4 (medium-sized; use only yolks, not whites; yolks create a smoother texture);
- Granulated sugar: 80g (Italian-style gelato favors a clean taste; sugar should not exceed 16% of total ingredient weight. Beginners should not reduce sugar, as it affects freezing);
- Vanilla bean: 1 (or 1 teaspoon vanilla extract; vanilla bean offers a more natural flavor; split and scrape out seeds for use);
- Salt: 1 pinch (enhances flavor and balances sweetness—do not add more).
【5-Step Process—Monitor Each Step Closely!】
Step 1: Prepare Vanilla Milk Base—Low-Temperature Flavor Infusion (Avoid Burning!)
This step infuses vanilla flavor into the milk mixture while preventing egg curdling later:
- Pour milk and heavy cream into a small saucepan. Add vanilla bean seeds and pod (if using vanilla extract, add later), plus a pinch of salt. Heat gently over low heat;
- Heat until “small bubbles form at the edges” (approx. 70°C; without a thermometer, test with a fingertip—warm but not hot), then immediately remove from heat. Cover and let steep for 5 minutes to fully release the vanilla flavor.
- After steeping, remove the vanilla pod (discard it, as it affects texture). Set the milk mixture aside.
Important tip: Never boil the milk mixture! Excessive heat destroys the milk fat structure, leading to ice crystals in the final ice cream.
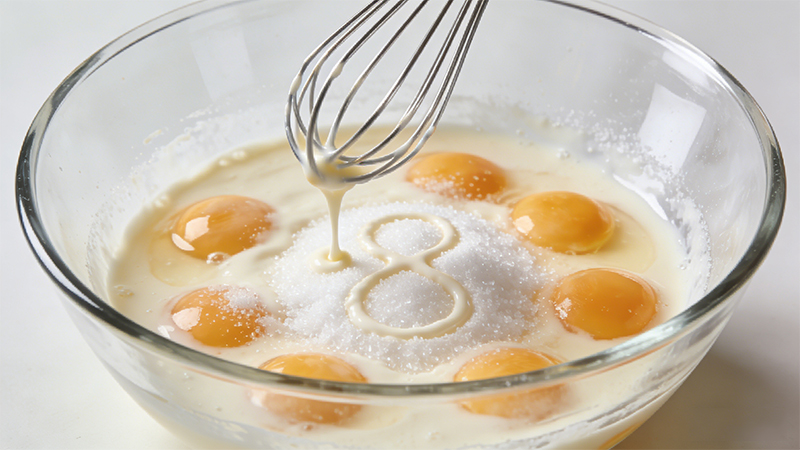
Step 2: Whip Egg Yolk and Sugar to Create a Smooth Batter (The Key is “Emulsification”)
The emulsification of egg yolks and sugar directly determines the creaminess of your ice cream. Beginners, don't cut corners:
- Place egg yolks in a large bowl free of oil and water. Add all granulated sugar and whip with an electric mixer on medium-high speed;
- Beat until the mixture lightens to a creamy white color, forms a ribbon when the whisk is lifted, and holds its shape for 10 seconds (this indicates proper emulsification, taking about 3-5 minutes—be patient and don't stop midway);
- If using vanilla extract, add 1 teaspoon now and mix thoroughly.
Beginner's tip: If whisking feels difficult, place the bowl in a pan of warm water (around 40°C/104°F) for a water-bath whisking method. This helps sugar dissolve faster and makes emulsification easier.
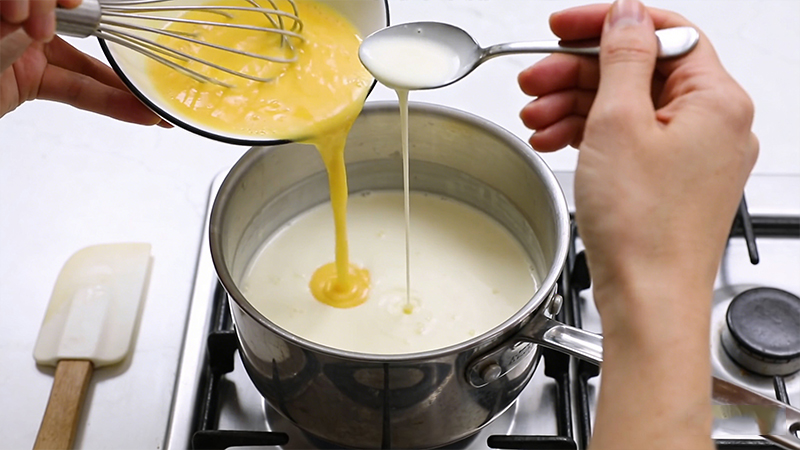
Step 3: Combine Milk Mixture with Egg Batter, Pasteurize at Low Temperature (Don't Cook It into Scrambled Eggs!)
- This step combines the egg mixture with the milk while pasteurizing the egg yolks at a low temperature (to avoid safety issues with raw yolks):
- Pour the vanilla milk mixture from Step 1 (cooled to lukewarm) into the emulsified egg yolk mixture in 3-4 batches, whisking vigorously with a hand mixer as you pour (this prevents the hot milk from cooking the egg yolks into scrambled eggs);
- Once fully combined, strain the mixture through a fine-mesh sieve (removing any potential egg yolk lumps or unmelted sugar for a smoother texture);
- Return the strained mixture to the small saucepan. Heat over the lowest possible flame, stirring constantly with a spatula (do not stop stirring throughout, focusing on the bottom to prevent scorching);
- Heat until the mixture thickens and coats the spatula, leaving a clear trail when a finger is drawn through it (temperature reaches approximately 82°C, the safe temperature for pasteurizing egg yolks). Immediately remove from heat.
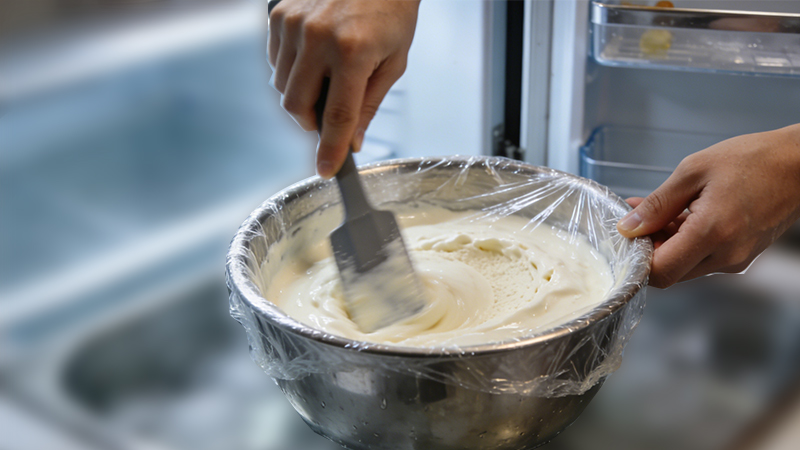
Step 4: Cooling and Maturation to Lock in Flavor (The Most Overlooked Critical Step)
Many beginners skip this step, resulting in bland ice cream with ice crystals. This must be done!
1. Pour the cooked ice cream base into a clean bowl. Place the bowl inside a larger container filled with ice water (ice bath). Stir with a spatula to rapidly cool the base to room temperature (takes about 10-15 minutes).
2. Once cooled to room temperature, cover tightly with plastic wrap (pressing it directly onto the surface to prevent a skin from forming). Refrigerate for at least 4 hours, preferably overnight (this “maturation” process intensifies flavors, facilitates easier churning later, and reduces ice crystals).
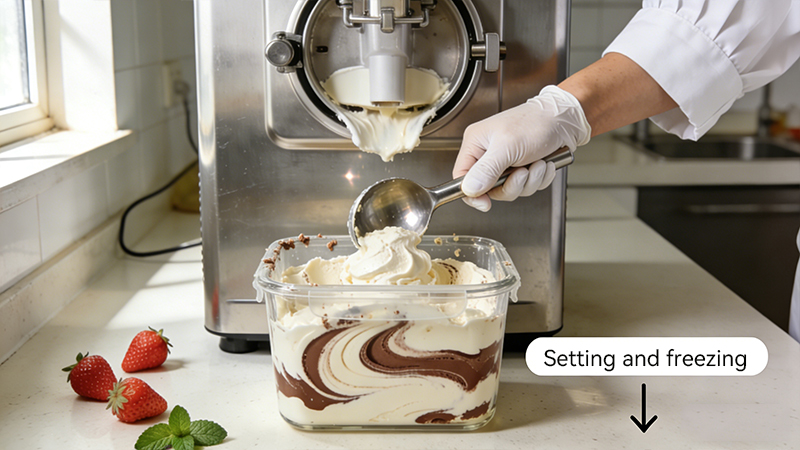
Step 5: Stir to Set + Refrigerate to Firm (Machine or Hand-Stir Method)
This step transforms the base into ice cream, focusing on “minimizing air incorporation to form fine ice crystals”:
① With an ice cream maker (recommended):
- Prepare the churning bowl according to the ice cream maker's instructions beforehand (for models with built-in cooling, simply preheat by turning it on; for standard models, freeze the bowl in the freezer for at least 12 hours to ensure it's rock-hard);
- Pour the chilled base into the ice cream maker, turn it on, and churn for 20-30 minutes;
- When the mixture reaches a “thick, soft-serve consistency that holds its shape and doesn't drip when scooped,” it's ready to remove (this is the “soft-serve” stage, which can be eaten immediately with a rich, creamy texture);
- Transfer the soft-serve ice cream into an airtight container. Gently smooth the surface (avoid pressing down hard to prevent air incorporation). Cover and freeze for 2-4 hours to set. When ready to serve, remove and let sit at room temperature for 5 minutes (this enhances smoothness).
② Without an ice cream maker (alternative method, slightly less creamy but still edible):
- Pour the chilled base into an airtight container and freeze for 1 hour;
- Remove and break up any frozen chunks with a fork or whisk (ice crystals will form—break them down thoroughly), then return to the freezer;
- Remove and stir every 30-40 minutes, repeating 3-4 times (break down large ice crystals each time to minimize air incorporation);
- After the final stir, seal tightly and freeze for 2 hours to set (though not as smooth as machine-made, it tastes much better than direct freezing).
【Beginner's Pitfall Guide】
- Too many ice crystals? Likely due to these two reasons: the base wasn't sufficiently chilled, or too much air was incorporated during mixing (especially if using a hand mixer instead of a machine, or not mixing enough times).
- Overly thick and cloyingly sweet? Definitely used too much heavy cream. Strictly control the fat content—don't exceed 8% of the total ingredient weight.
- Egg curdling? Either the milk mixture was too hot, or you didn't stir continuously while pouring. Remember to add milk in batches while whisking vigorously. - Flavor lacking? Don't skimp on vanilla pods! If using extract, use sparingly (it can taste chemical), or extend chilling time by 1 hour. 【Flavor Enhancement Tips】(Master these to adapt endlessly)
After perfecting the base recipe, try these classic flavors by adding corresponding ingredients:
- Pistachio: Grind 50g roasted pistachios into powder. Add during step 2 when whipping egg yolks and sugar, mixing thoroughly;
- Lemon Flavor: Subtract 100ml milk, then add 50ml fresh lemon juice + 50g lemon zest (use only the yellow part—avoid the white pith, which is bitter);
- Chocolate Flavor: When making the milk mixture in step one, add 30g dark chocolate (70% cocoa content or higher) and stir until melted.
Making Italian gelato at home isn't as difficult as you might think. The key is to patiently master the “maturation” and “stirring” steps. Beginners should start with classic vanilla flavor. Once you've mastered the technique, try other flavors—you'll soon unlock the authentic street gelato texture!

Most popular More «
-
BC Series Can-Shaped Beverage Coolers
-
Do Cakes Require Commercial Refrigerators?
-
Best EC50 Mini Beverage Cooler for Global Export
-
Guide to Floor-Standing Refrigerated Cabinets for Coffee Shops
-
Why Cooluma Focuses on the Mid-to-High-End Refrigerated Display Cabinet Segment?
-
How Many Pans Does a Gelato Display Freezer Hold?
-
Why Are Cooluma Cake Display Cabinets So Popular?
-
Commercial Bakery Display Case with Curved Glass
-
A Buying Guide for Cake Display Cabinets with Built-in Adjustable Layered Shelves
-
An Analysis of the Advantages of Stainless Steel Refrigerated Display Cabinets